Growing chives in containers is a fantastic way to enjoy fresh, flavorful herbs right at your fingertips, even if you have limited space. These hardy perennials thrive in pots, offering a low-maintenance option for adding onion-like zest to your meals. You can place them on balconies, windowsills, or patios, making them ideal for urban gardeners or those without traditional garden beds.
Chives are not only versatile in the kitchen but also attract pollinators with their pretty purple flowers. By choosing the right container and care routine, you’ll ensure a bountiful harvest year after year. This approach keeps your plants protected from pests and allows for easy mobility during seasonal changes.
Whether you’re a beginner or seasoned gardener, these ideas will help you maximize your chives’ potential. Let’s explore creative setups that blend functionality with aesthetics for your container herb garden.
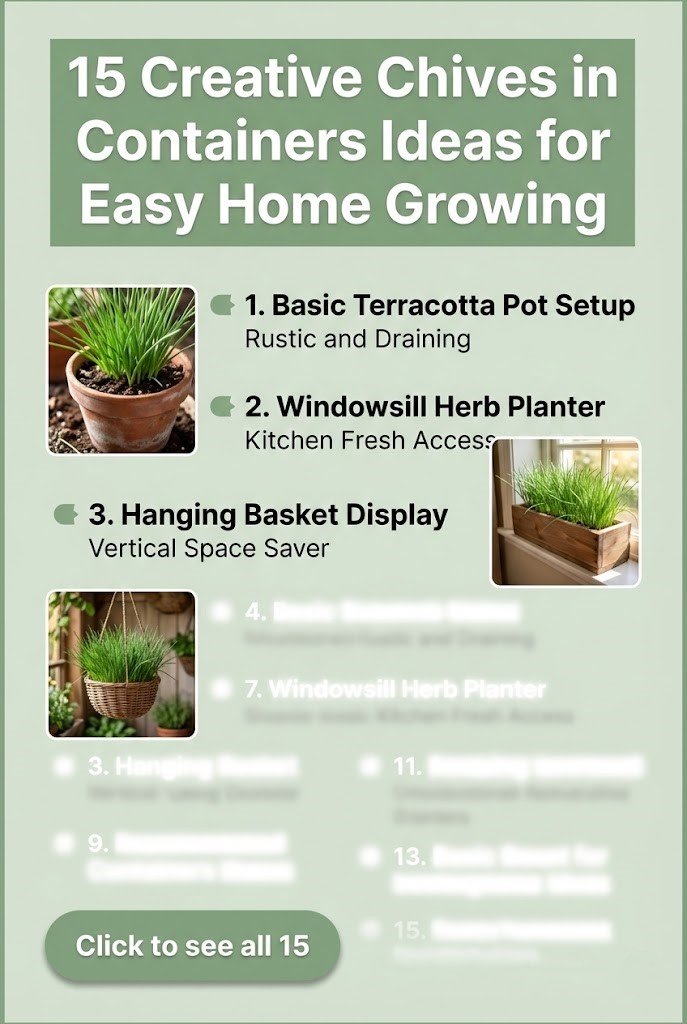
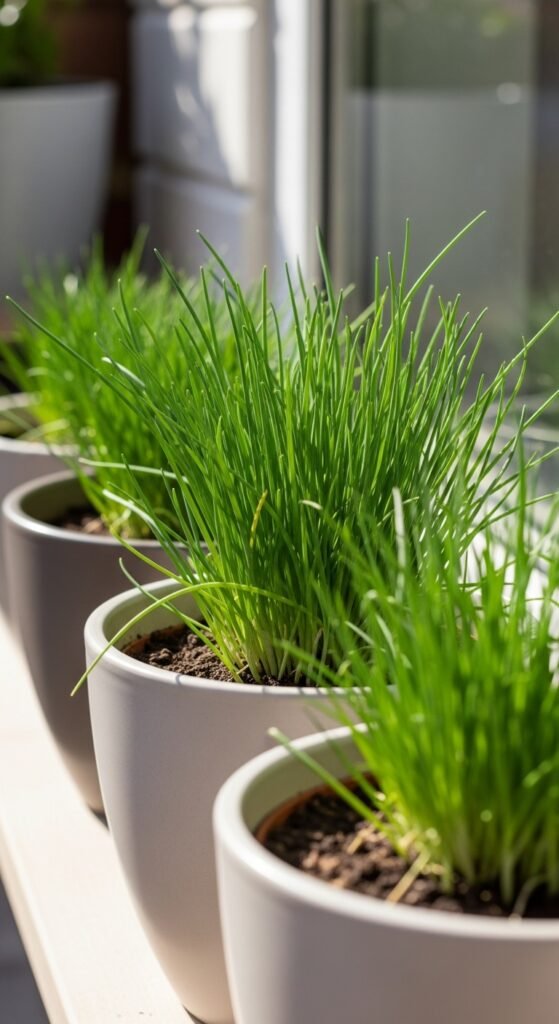
1) Basic Terracotta Pot Setup
You start with a simple terracotta pot, which provides excellent drainage and a rustic look for your chives. Choose a 6-8 inch diameter pot to give the roots room to spread without overwhelming small spaces. Fill it with well-draining soil mix for herbs to prevent waterlogging, mixing in some compost for nutrients.
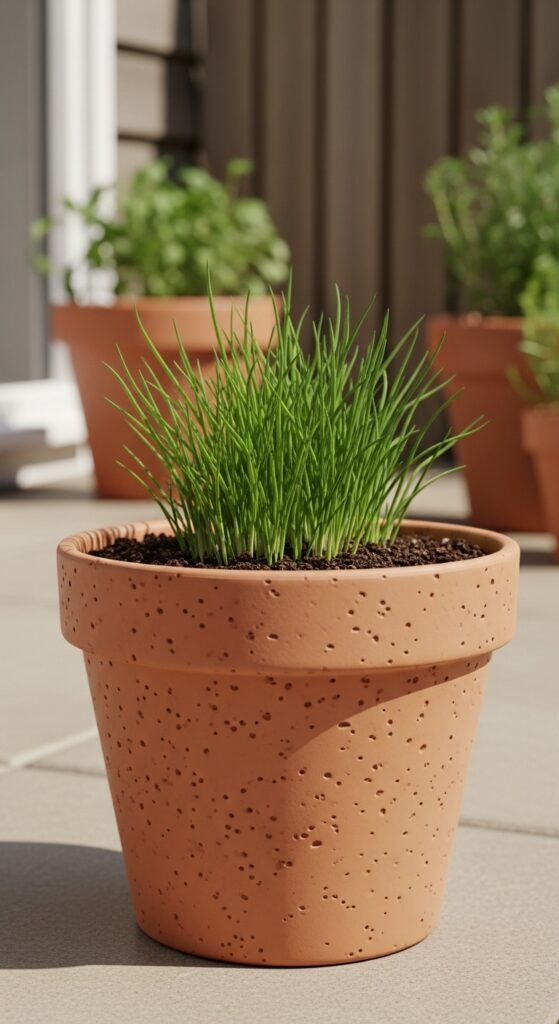
Why this works: Terracotta’s porous nature helps regulate moisture, crucial for chives that dislike soggy feet. You’ll enjoy healthier plants with fewer root rot issues, leading to more abundant growth and easier harvesting.
How to do it: Plant chive seeds or divisions about 1/4 inch deep, spacing them 4-6 inches apart. Water gently until established, then maintain even moisture. Place in full sun for 6+ hours daily. Harvest by snipping outer leaves, promoting bushier growth. This setup yields fresh chives for salads and garnishes all season long.
2) Windowsill Herb Planter
You can create a compact windowsill setup using a long, shallow container that fits perfectly on your kitchen ledge. Opt for a 12-18 inch rectangular planter to accommodate multiple chive clumps alongside other herbs.
The benefit here is convenience – you’ll have fresh chives at arm’s reach while cooking, encouraging more frequent use in your dishes. It’s space-efficient and brings a touch of green indoors.
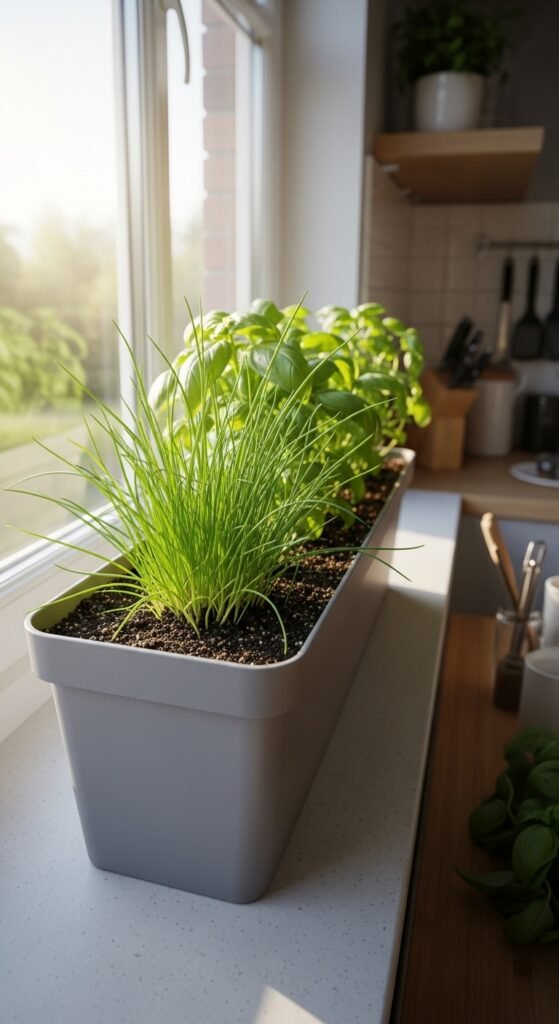
To set it up: Line the bottom with gravel for drainage, then add potting soil. Plant chive starts 4 inches apart. Position in a south-facing window for ample light. Water when the top inch of soil dries, and fertilize monthly with diluted organic feed. Snip regularly to keep plants compact and productive. For inspiration on indoor setups, check out our guide on windowsill herb garden arrangements.
3) Hanging Basket Display
You transform a standard hanging basket into a cascading chive haven, perfect for porches or balconies with limited floor space. Use a 10-12 inch wire basket lined with coco fiber for better aeration.
This method maximizes vertical space and adds visual interest with dangling foliage. You’ll get improved air circulation, reducing disease risks, and easier access for harvesting.
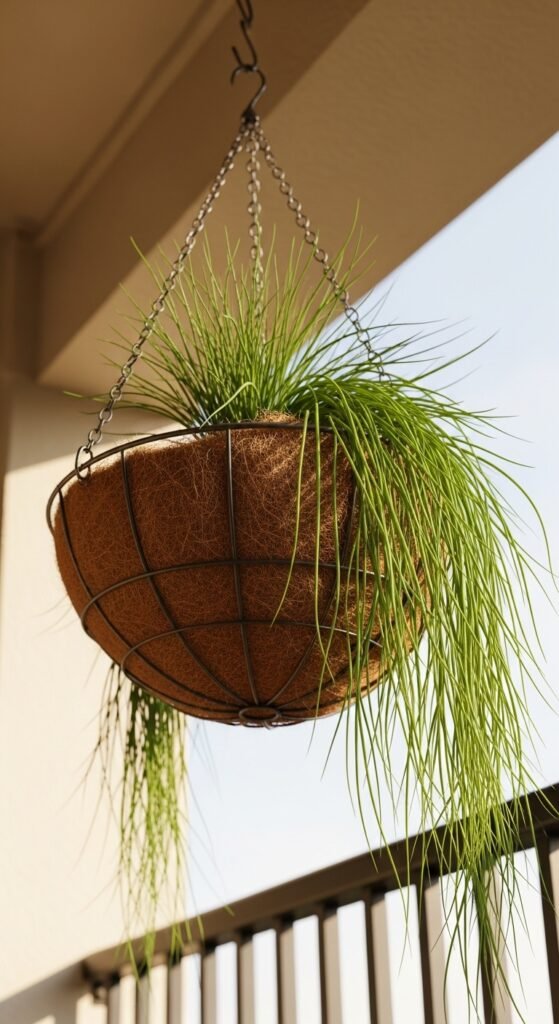
Implementation: Fill with lightweight potting mix amended with perlite. Plant 3-5 chive divisions around the edges, allowing them to trail. Hang in partial to full sun, watering more frequently due to faster drying. Use a slow-release fertilizer in spring. Trim flowers to encourage leaf production. This setup pairs well with other trailing herbs for a lush, edible display.
4) Recycled Container Garden
You repurpose old buckets or tins into unique chive containers, adding character to your garden while being eco-friendly. Ensure containers have drainage holes and are food-safe if previously used.
Why choose this: It’s budget-friendly and reduces waste, plus the variety of shapes creates an eclectic look. You’ll promote sustainability while enjoying homegrown herbs.
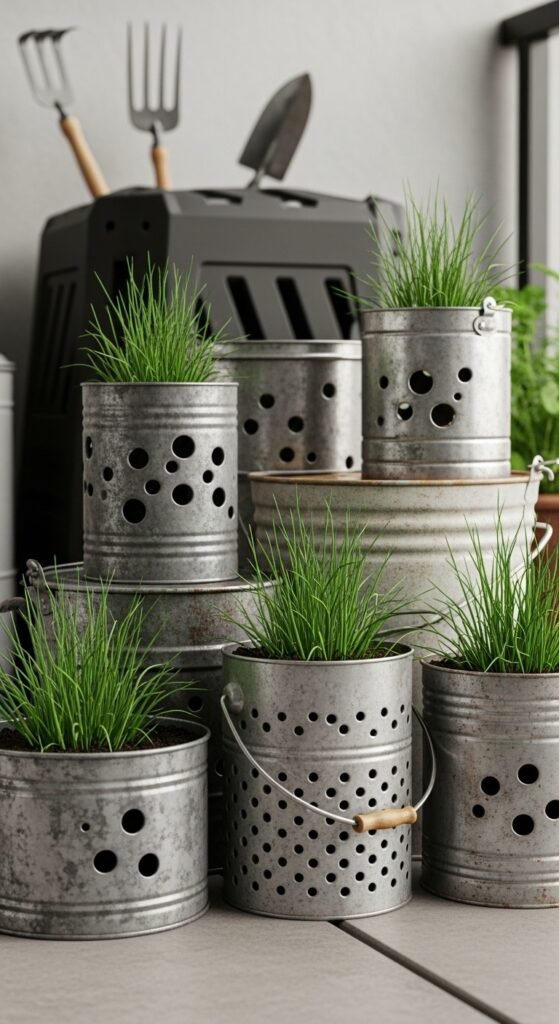
Steps: Clean containers thoroughly, drill holes if needed. Fill with herb-specific soil, plant chive seeds or bulbs. Place in sunny spots, grouping for visual impact. Water consistently, checking more often in metal containers that heat up. Harvest by cutting at base. For more on sustainable practices, explore our tips on herb gardening for beginners.
5) Tiered Planter System
You utilize a multi-level planter to grow chives at different heights, optimizing space in small areas. A three-tier stand works well, with larger pots at the bottom.
Benefits include better sunlight distribution and easier organization. You’ll harvest more efficiently without bending, and it creates a striking vertical feature.
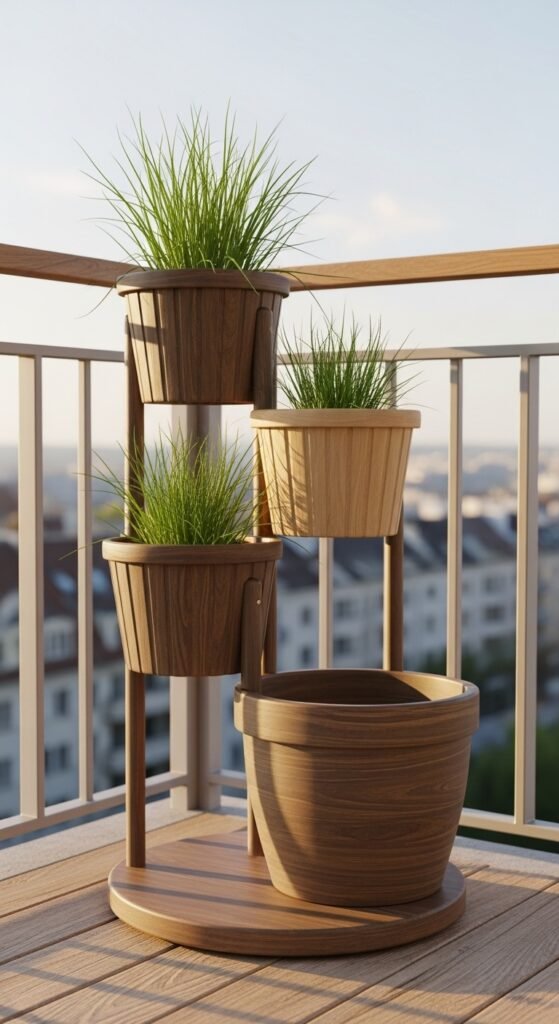
How-to: Select weather-resistant tiers, fill each with draining soil. Plant denser in top levels for cascading effect. Position in full sun, rotating occasionally for even growth. Use drip irrigation for uniform watering. Fertilize lightly every few weeks. This system allows companion planting with compatible herbs.
6) Self-Watering Pot Innovation
You invest in or DIY a self-watering container to maintain consistent moisture for your chives. These have reservoirs that wick water up as needed.
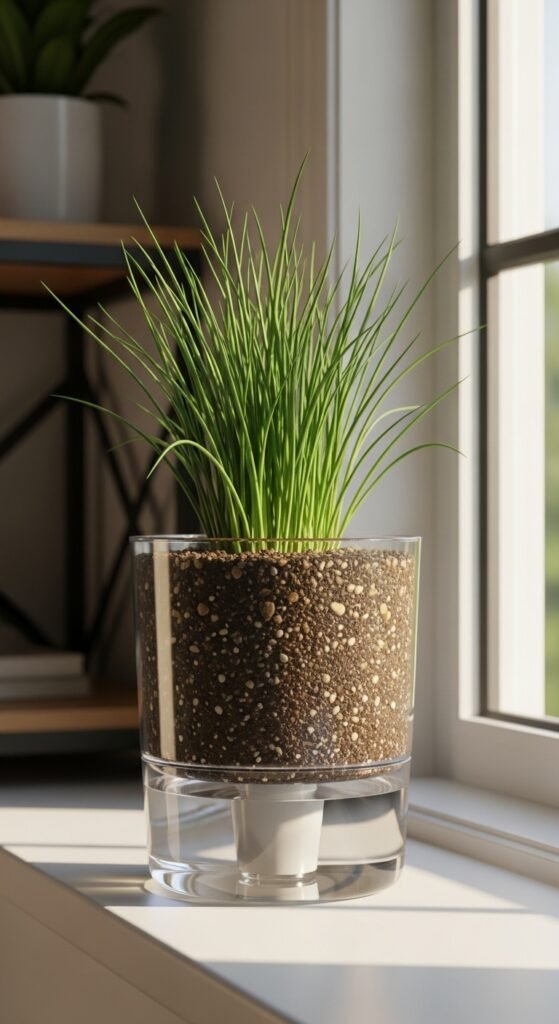
This is ideal for forgetful gardeners or hot climates, preventing both over and under-watering. You’ll see healthier, more vigorous growth with less effort.
Setup: Choose a 8-10 inch self-watering pot, fill soil compartment with moisture-retaining mix. Plant chive clumps, fill reservoir. Place in bright location. Refill water weekly, add liquid fertilizer monthly. Snip leaves regularly. Pair with other moisture-loving plants for a thriving setup.
7) Companion Planting Combo
You pair chives with compatible vegetables in a large container for mutual benefits. A 18-24 inch pot allows space for tomatoes or carrots alongside.
Why: Chives deter pests naturally, improving overall plant health. You’ll maximize container space and create a mini ecosystem for better yields.
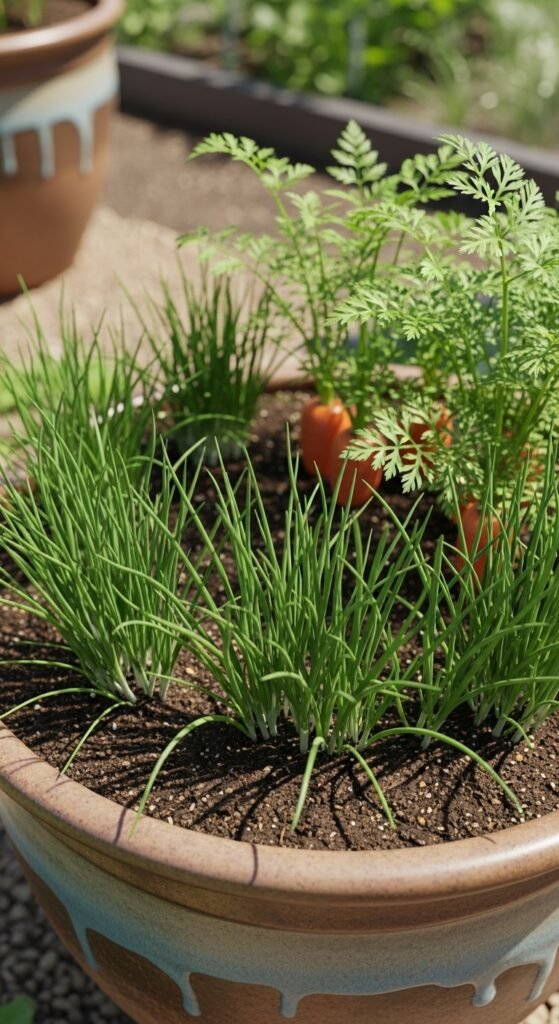
Method: Use rich, well-draining soil. Plant chives around edges, veggies in center. Ensure full sun exposure. Water deeply but infrequently. Harvest chives sparingly at first. For best pairings, refer to our herb companion chart to enhance your garden’s productivity.
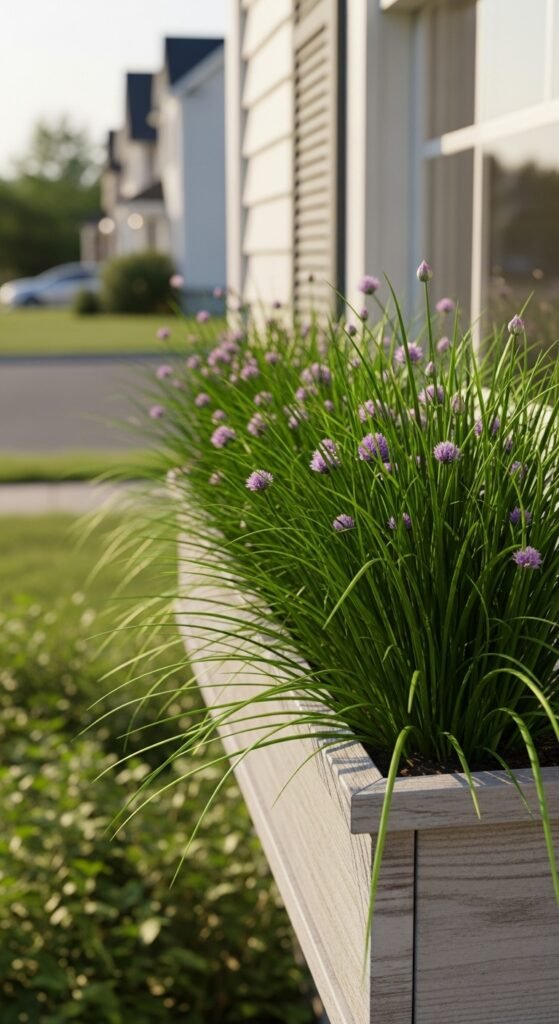
8) Decorative Urn Arrangement
You elevate your chives in an ornate urn for a sophisticated touch on patios or entryways. Select a 12-16 inch wide urn with drainage.
This adds elegance while keeping herbs accessible. You’ll blend functionality with decor, enhancing your outdoor aesthetics.
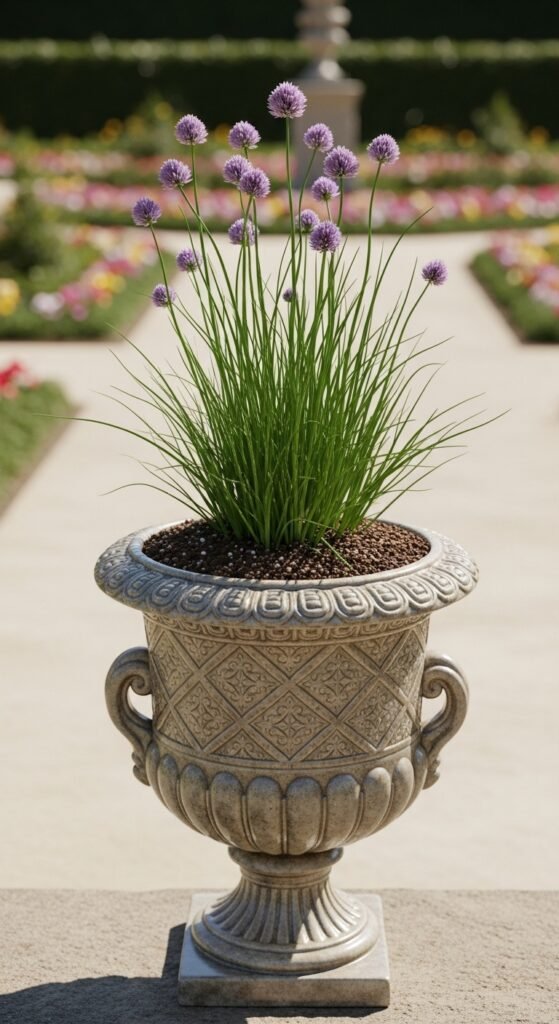
To create: Fill with premium potting mix, plant multiple chive divisions for fullness. Position in sunny spot protected from wind. Water when soil surface dries. Use organic mulch to retain moisture. Trim flowers for continuous leaf production. This setup complements formal garden styles beautifully.
9) Vertical Pocket Planter
You mount a fabric pocket planter on a wall to grow chives vertically, saving floor space. Pockets allow individual plant care.
Advantages: Ideal for apartments, improves air flow, and creates a living wall art piece. You’ll have easy access for frequent harvesting.
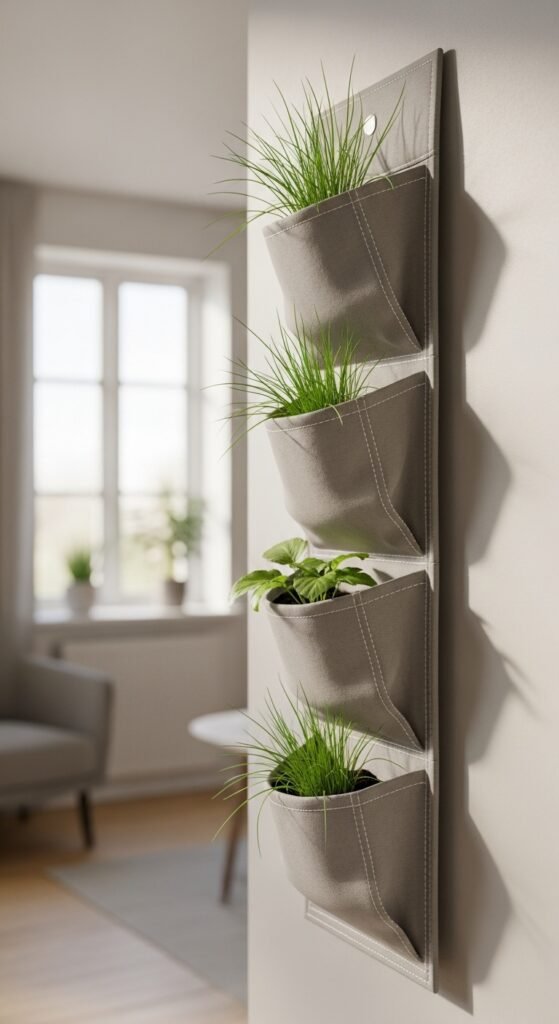
Installation: Choose a sunny wall, fill pockets with lightweight soil. Plant one chive per pocket. Water from top, allowing drainage. Fertilize with diluted solution biweekly. Rotate plants if light is uneven. This innovative approach suits modern, space-conscious gardeners.
10) Whiskey Barrel Half
You use a halved whiskey barrel as a rustic container for abundant chive growth. Its size accommodates a large clump for heavy harvesting.
Why opt for this: The wood provides insulation, and the charm fits farmhouse styles. You’ll get a substantial herb supply in one spot.
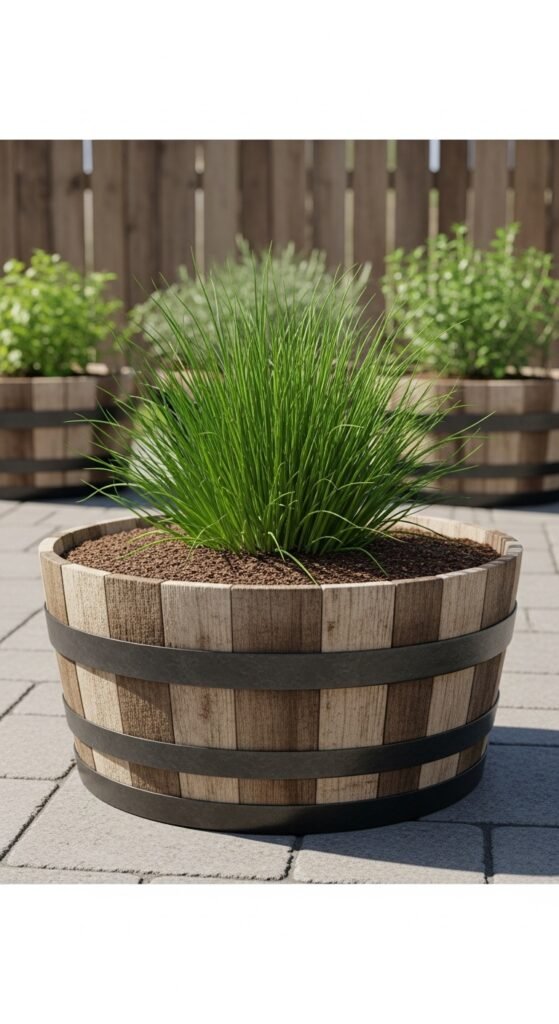
Process: Drill drainage holes, line with landscape fabric. Fill with amended soil, plant chive seeds or starts. Place in full sun. Water thoroughly, mulching to conserve moisture. Divide every few years. Explore more rustic ideas in our container gardening ideas.
11) Mason Jar Herb Station
You craft a charming setup using mason jars mounted on a board for individual chive plants. This works great for kitchens or small patios.
It’s customizable and inexpensive, allowing easy monitoring of each plant. You’ll add a vintage vibe while keeping herbs fresh and handy.
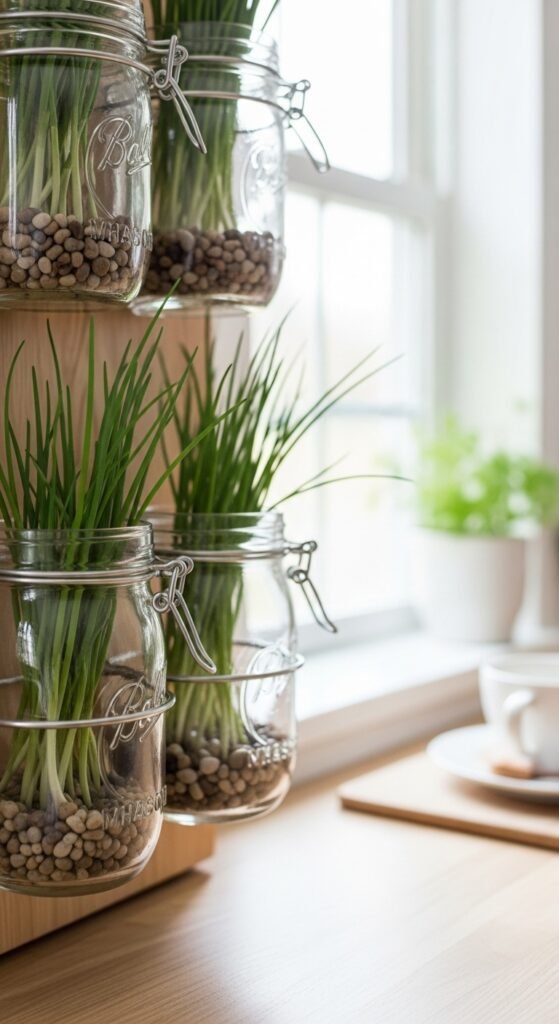
DIY steps: Secure jars to wood with clamps, add pebbles for drainage. Fill with soil, plant chive divisions. Hang in bright indirect light. Water carefully to avoid overflow. Mist leaves for humidity. This portable option is perfect for renters or frequent movers.
12) Strawberry Pot Conversion
You repurpose a terracotta strawberry pot with multiple pockets for chive clusters. Each opening hosts a small bunch.
Benefits: Maximizes surface area, promotes good drainage, and creates a sculptural element. You’ll harvest from various levels effortlessly.
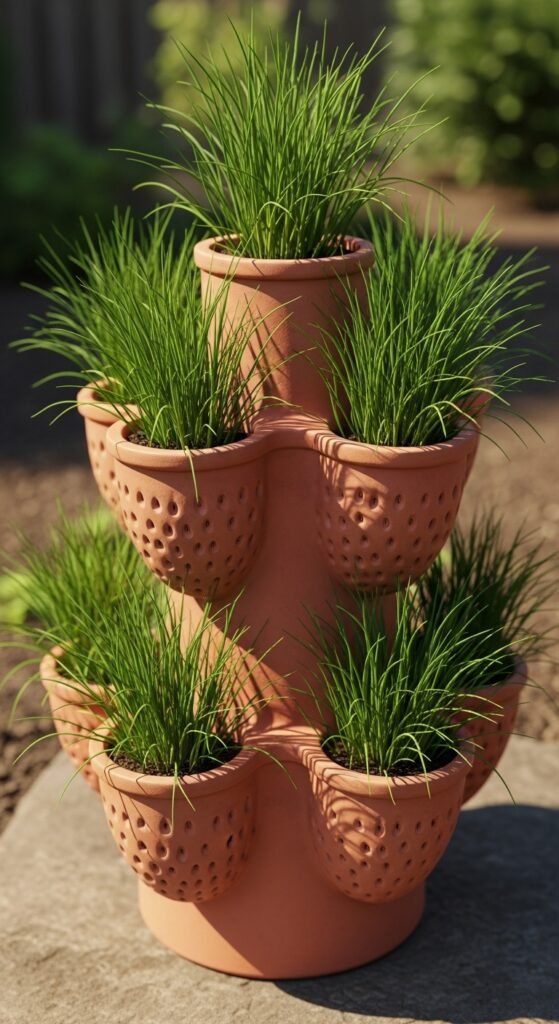
How: Fill central column first, then pockets with soil. Plant young chives in each hole. Position in sunny location. Water from top, ensuring even distribution. Fertilize sparingly. This multi-level design encourages dense, healthy growth throughout the container.
13) Window Box Overflow
You fill a window box with chives for a lush, overflowing display outside your home. A 24-36 inch box provides ample space.
This enhances curb appeal and utilizes unused areas. You’ll enjoy the visual softness and aromatic benefits near entry points.
Setup: Secure box brackets, line with plastic for protection. Use quality potting mix, plant densely for fullness. Ensure 4-6 hours sun. Water regularly, deadhead flowers. Combine with trailing plants for texture. For more on window setups, see our best herbs for containers recommendations.
14) Pallet Vertical Garden
You construct a standing pallet planter for chives, stapling fabric to create pockets. This upcycled piece adds rustic charm.
It’s space-saving and budget-friendly, allowing for expanded growing in tight quarters. You’ll promote better drainage and air circulation.
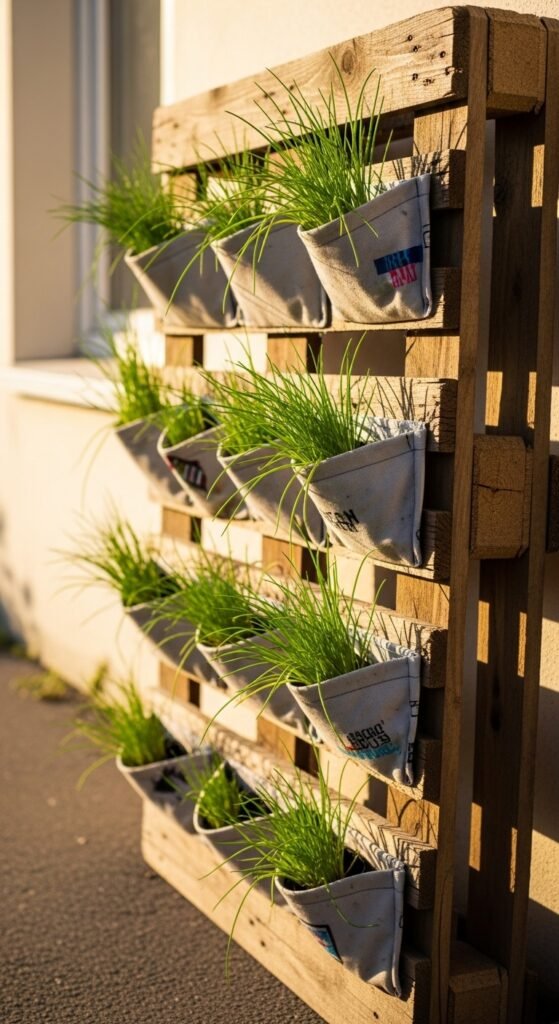
Build it: Sand pallet, attach landscape fabric pockets. Fill with soil, plant chives horizontally. Lean against wall in sun. Water gently, checking lower levels. Add wheels for mobility. This eco-conscious idea suits sustainable gardening enthusiasts.
15) Ceramic Bowl Cluster
You group several small ceramic bowls together for a modular chive garden. Use 4-6 inch bowls for individual plants.
Why: Offers flexibility to rearrange and easy replacement if needed. You’ll create a customizable, decorative focal point.
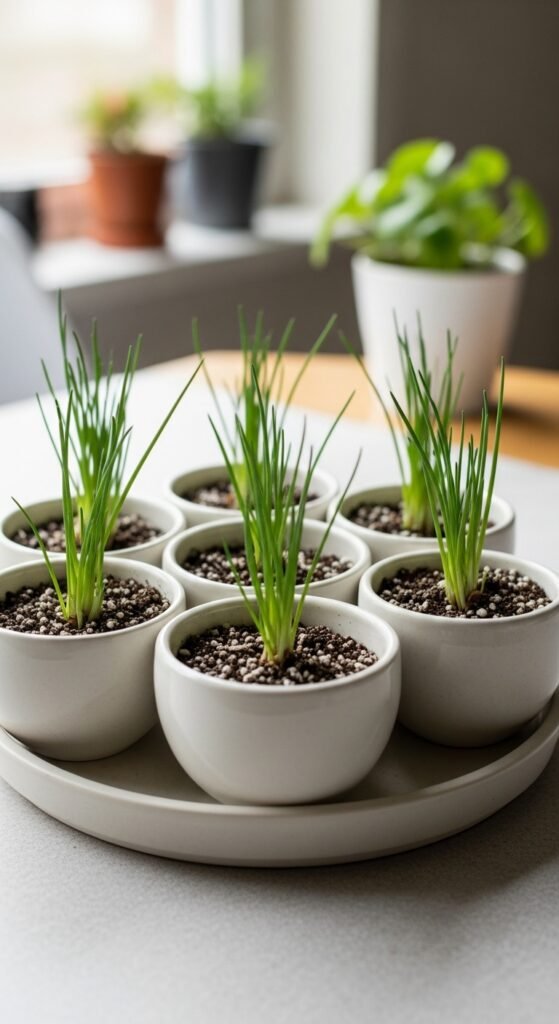
Method: Choose glazed bowls with holes, fill with gritty soil mix. Plant one chive per bowl. Cluster on a tray in bright spot. Water individually, rotate for even light. Harvest as needed. This approach allows experimenting with different varieties in one area.
Key Principles for Success
Soil and Drainage Essentials

You must prioritize well-draining soil to prevent root issues in container-grown chives. Mix standard potting soil with sand or perlite at a 2:1 ratio for optimal texture.
Light and Location Tips
Position your containers where they receive at least 6 hours of direct sunlight daily. You can move them seasonally to catch the best rays, ensuring robust growth.
Maintenance and Harvesting

Water when the top soil feels dry, fertilize every 4-6 weeks with balanced organic feed. Harvest regularly by cutting outer stems to encourage new growth and prevent flowering if desired.
Frequently Asked Questions
Can chives grow indoors year-round?
Yes, with sufficient light from a south-facing window or grow lights, chives thrive indoors, providing fresh herbs even in winter.
How often should I divide container chives?
Divide every 2-3 years in spring when the clump becomes crowded, replanting sections to maintain vigor.
Do chives need full sun in containers?
They prefer full sun but tolerate partial shade, though growth may be leggier with less light.
Can I overwinter chives in pots?
Yes, move to a protected area or insulate pots; chives are hardy perennials that survive cold with minimal care.
What pests affect container chives?
Watch for aphids or onion thrips; rinse with water or use mild soap spray for control.