
A self watering raised bed represents an advanced gardening solution that integrates efficient irrigation directly into the planting structure. You can maintain consistent soil moisture without daily manual watering, promoting healthier plant roots and reducing water waste. This system typically employs reservoirs, wicking materials, or capillary action to deliver water from below, mimicking natural groundwater processes while minimizing evaporation.
Implementing a self watering raised bed enhances your gardening productivity by conserving time and resources, particularly in variable climates. You benefit from improved soil aeration and reduced weed growth, common advantages of raised beds, combined with automated hydration. Whether you are a novice or experienced gardener, these designs support sustainable practices and yield abundant harvests with minimal intervention.
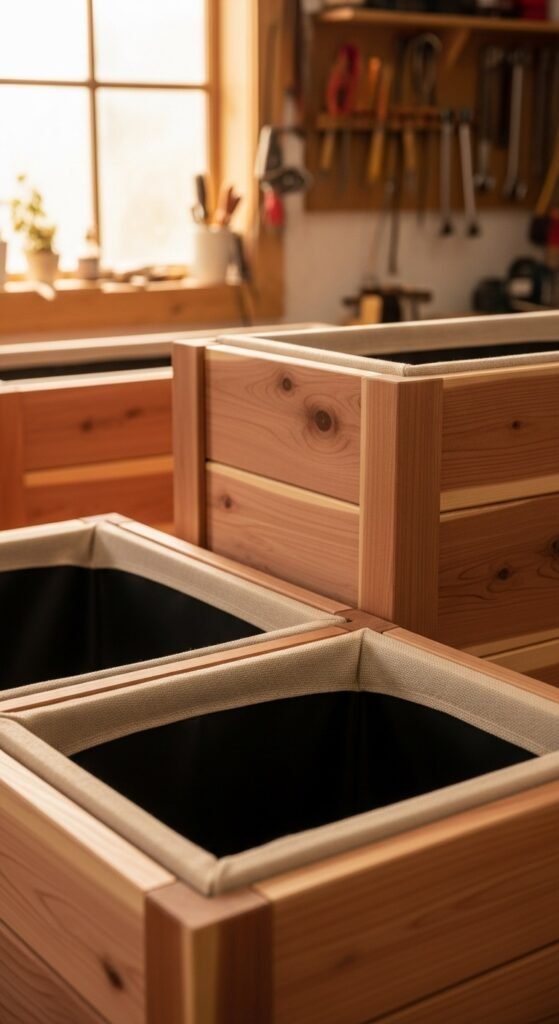
1) Basic Wicking Bed System
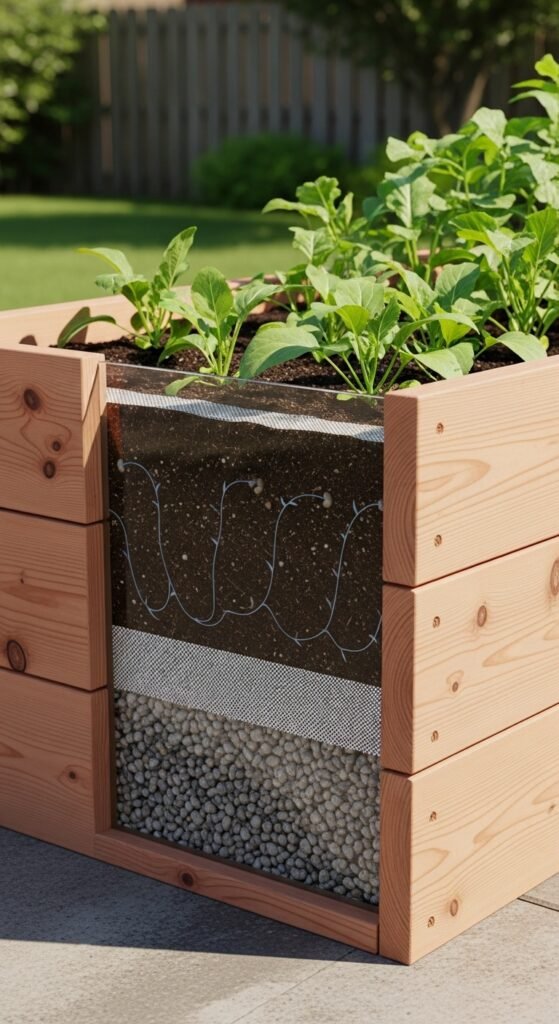
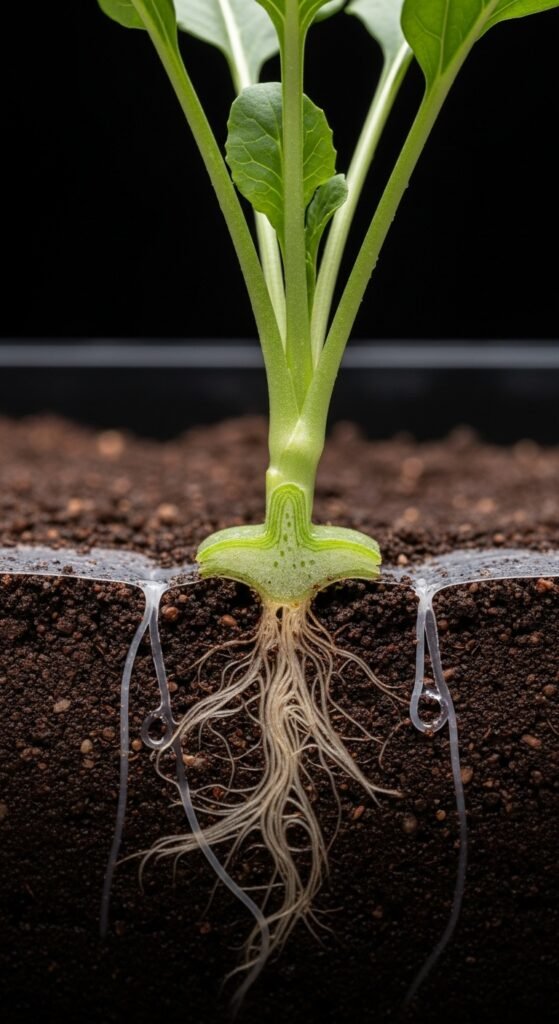
You begin with a fundamental wicking bed by constructing a raised frame from wood or metal, lining it with a waterproof membrane, and adding a reservoir layer of gravel or perforated pipes at the base. Above this, place a geotextile fabric to separate the soil, ensuring water wicks upward through capillary action. This setup provides consistent moisture, preventing overwatering and underwatering issues that plague traditional beds.
The primary advantage lies in its low-maintenance nature; you refill the reservoir periodically, allowing plants to draw water as needed. Ideal for busy gardeners, it supports robust root development and higher yields. To build one, measure your space, assemble the frame to at least 12 inches high, install the reservoir, and fill with quality potting mix. For enhanced efficiency, integrate it with rainwater harvesting ideas to sustain the water supply naturally.
2) Integrated Rain Barrel Design
Incorporate a rain barrel directly into your self watering raised bed for an eco-friendly hydration source. You position the barrel adjacent to or beneath the bed, connecting it via tubing to the internal reservoir. This captures rooftop runoff, channeling it to your plants without additional effort. Such integration reduces reliance on municipal water, lowering costs and environmental impact.
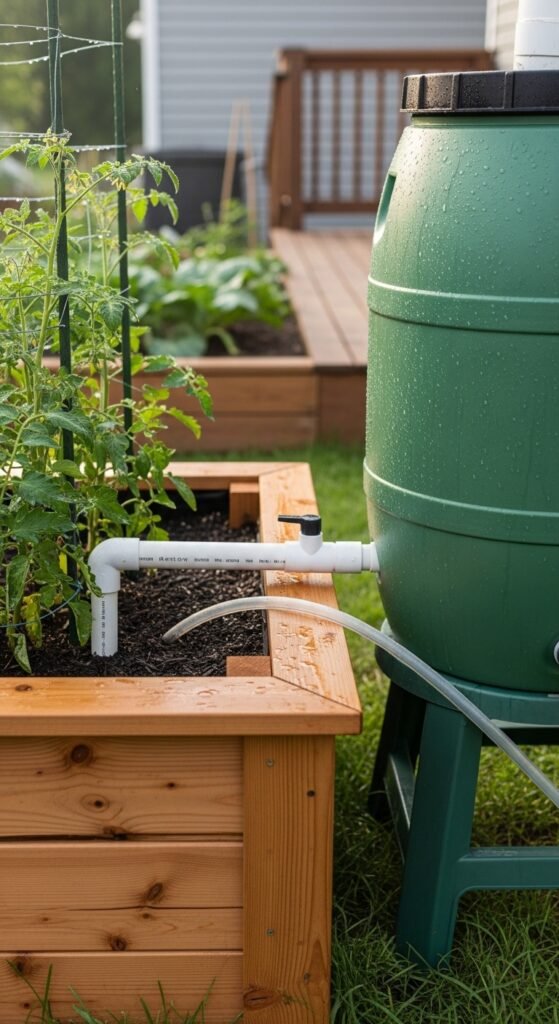
You appreciate the sustainability, as it promotes water conservation while maintaining optimal soil conditions. During dry spells, the stored rainwater ensures uninterrupted supply. Construct this by elevating the barrel for gravity flow, drilling connection points, and adding an overflow mechanism. Complement this with DIY rain barrel techniques to customize the capacity to your garden’s needs.
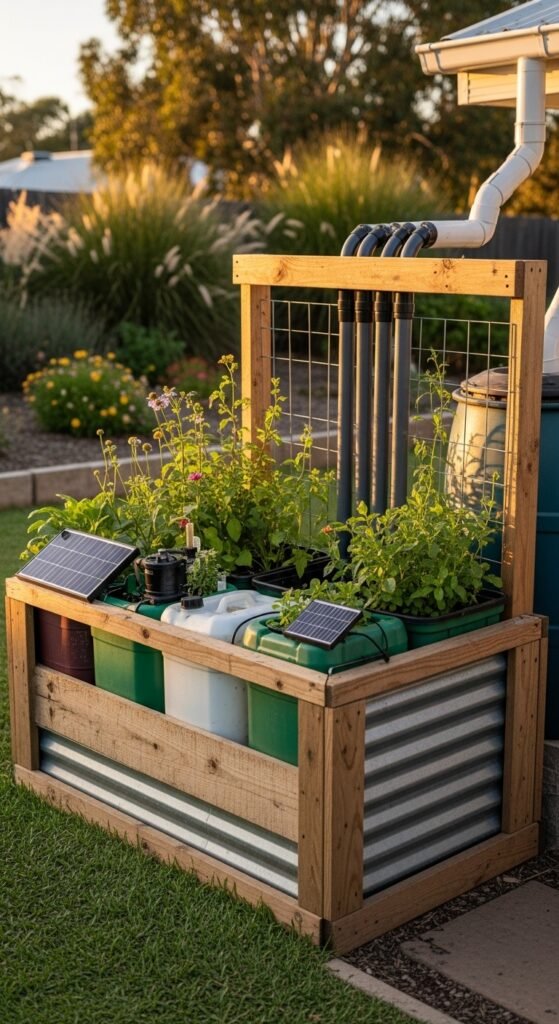
3) Solar-Powered Pump Enhancement
Elevate your self watering raised bed with a solar-powered pump that automates water circulation from a nearby source. You install solar panels to power a small submersible pump, which draws water into the bed’s reservoir on a timer or sensor basis. This technology ensures precise watering, adapting to sunlight availability and plant requirements.
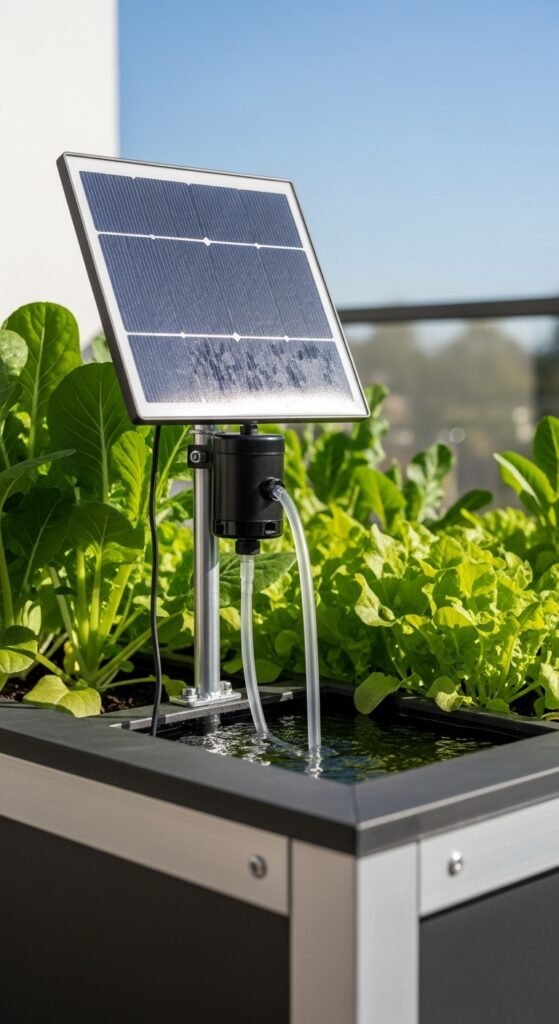
The benefit is evident in energy independence and reduced manual labor, making it suitable for remote or off-grid gardens. You experience fewer fluctuations in moisture levels, fostering vigorous growth. Setup involves selecting a pump rated for your bed size, mounting panels for maximum exposure, and integrating sensors for efficiency. Explore solar garden pump options to optimize this innovative feature.
4) Recycled Materials Construction
Utilize recycled materials like old pallets or plastic containers to build a cost-effective self watering raised bed. You disassemble pallets for framing, line with reclaimed plastic sheeting, and use bottles as wicking chambers in the base. This approach minimizes waste while creating a functional, durable structure.
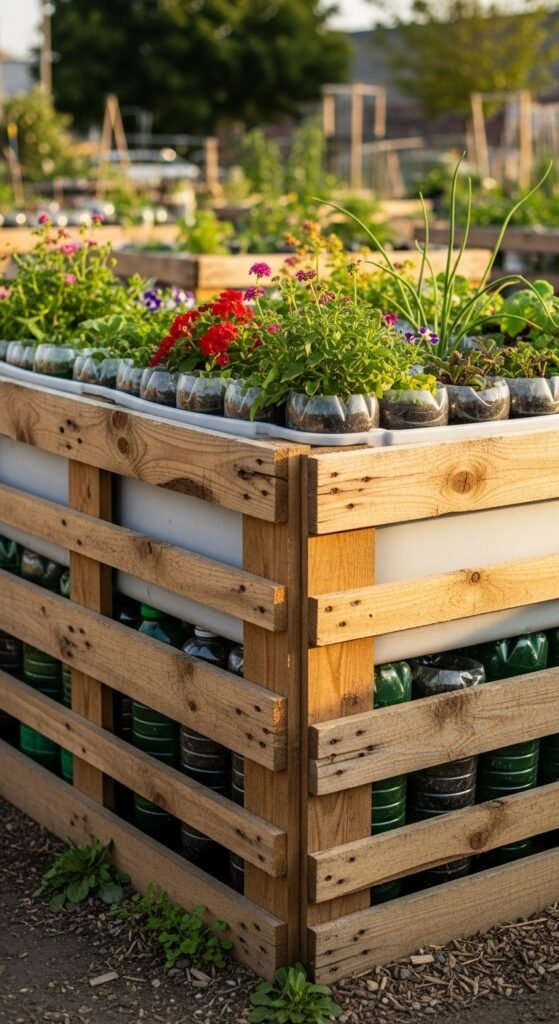
You gain environmental satisfaction and budget savings, with the bed performing comparably to commercial models. The recycled elements often add unique aesthetics to your garden. Assemble by securing frames, adding the liner and wicking system, then topping with soil. For seasonal adjustments, consider summer watering schedule guidelines to maintain balance.
5) Compact Balcony Version
For urban spaces, design a compact self watering raised bed suited to balconies, using shallow containers with built-in reservoirs. You select lightweight materials like fiberglass or fabric pots, incorporating overflow holes and fill tubes. This maximizes limited areas, enabling fresh produce cultivation in apartments.
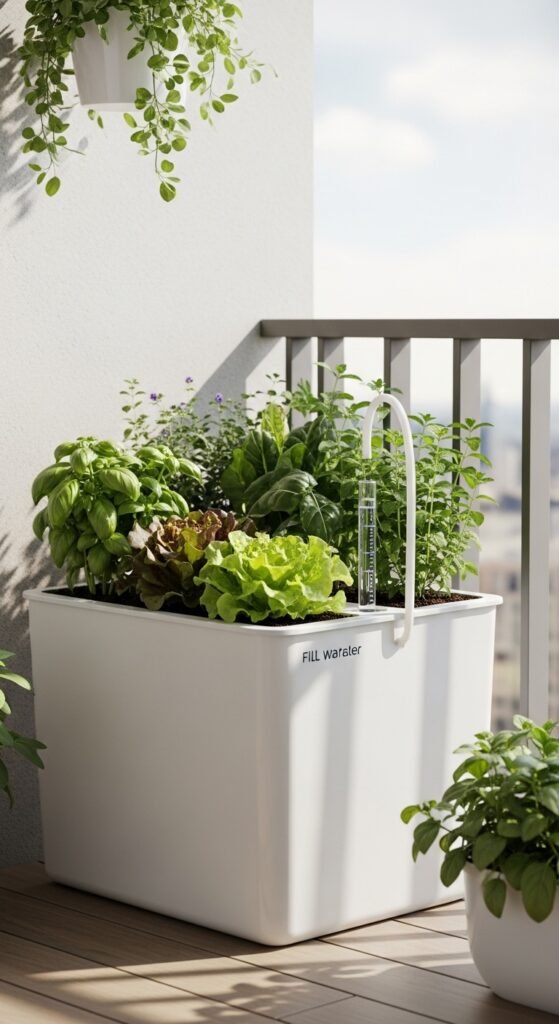
You enjoy convenience and aesthetic appeal, with easy access for monitoring. The system prevents water runoff, ideal for elevated settings. Build by choosing containers 6-8 inches deep, adding a separator and soil, then planting herbs or greens. Pair it with spring watering schedule practices for year-round success.
6) Companion Planting Optimized
Optimize your self watering raised bed for companion planting, grouping compatible species like tomatoes with basil to enhance mutual benefits. You arrange plants strategically within the moist environment, leveraging the consistent hydration for symbiotic relationships. This boosts biodiversity and pest resistance, leading to healthier ecosystems.
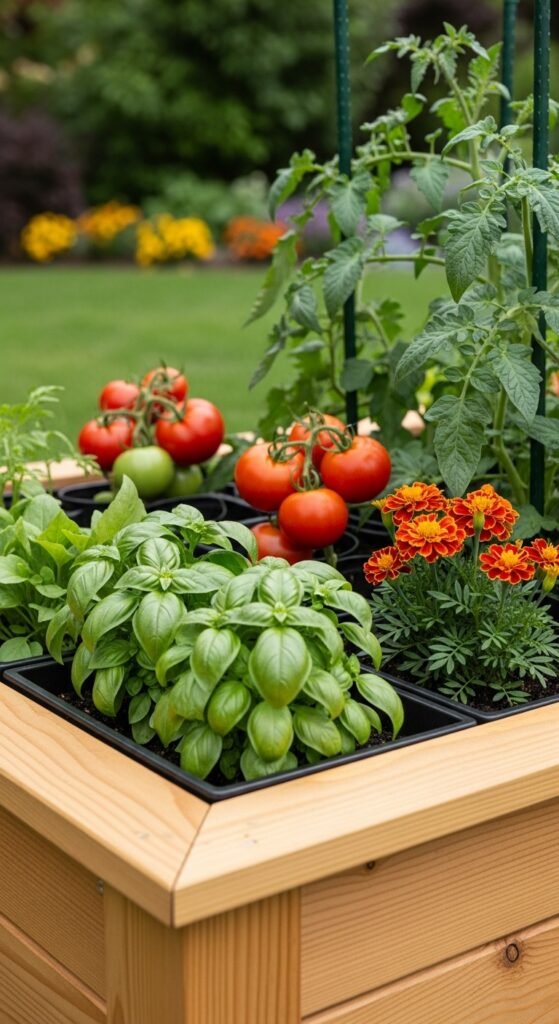
You observe improved flavors and yields, with reduced need for interventions. The self-watering aspect supports dense planting without stress. Plan by researching companions, mapping the bed layout, and sowing accordingly. Incorporate insights from keyhole garden designs for efficient access and maintenance.
7) Vegetable-Specific Configuration
Tailor a self watering raised bed for vegetables, focusing on deep-rooted crops like carrots or potatoes that thrive in uniform moisture. You use taller frames, up to 18 inches, with enhanced reservoir capacity to accommodate growth. This configuration yields bountiful harvests, minimizing rot and bolting risks.
You value the time savings and nutritional rewards from home-grown produce. The system ensures nutrients reach roots effectively. Construct by reinforcing the frame, layering materials, and selecting vegetable varieties suited to your zone. Enhance with drip irrigation setup for supplementary control.
8) Herb Garden Adaptation
Adapt a self watering raised bed for herbs, creating sections for Mediterranean varieties like rosemary that prefer drier tops but moist roots. You divide the bed with barriers, adjusting wicking rates per section. This promotes flavorful, aromatic growth, ideal for culinary use.
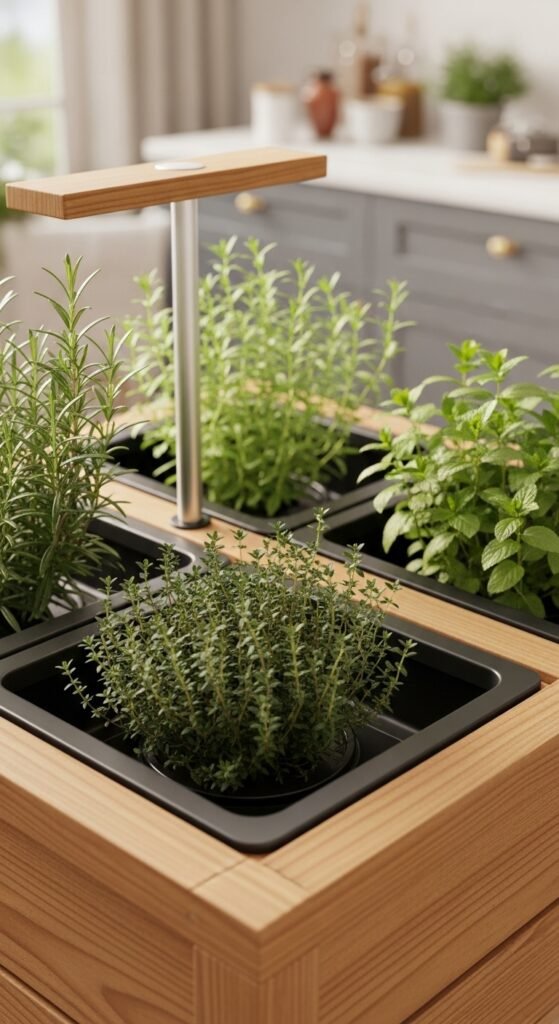
You appreciate the freshness and ease of harvesting from a dedicated space. The controlled watering prevents over-saturation common in herb care. Build by partitioning the frame, installing varied wicking materials, and planting densely. Reference soaker hose layout for integrated watering refinements.
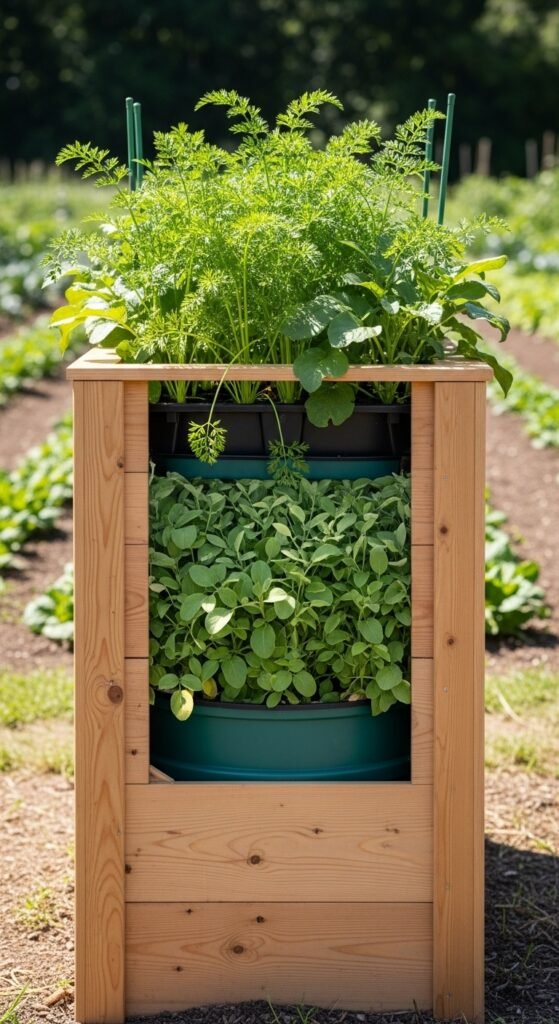
9) Multi-Tiered Structure
Construct a multi-tiered self watering raised bed to maximize vertical space, with cascading reservoirs feeding each level. You stack frames progressively smaller, connecting water flows downward. This increases planting area without expanding footprint, perfect for slopes or small yards.
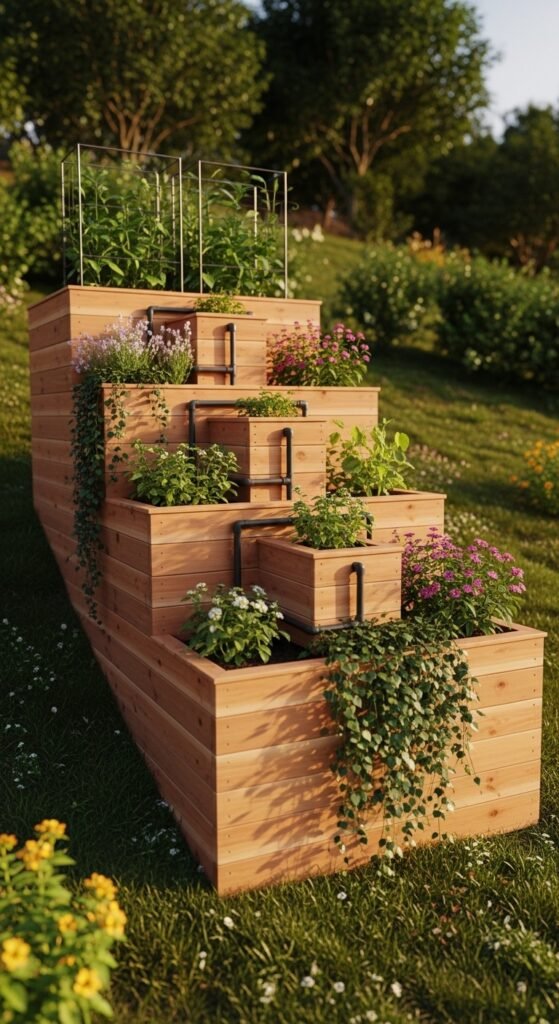
You benefit from ergonomic access and diverse microclimates for varied crops. The design enhances drainage and aesthetics. Assemble by building tiers securely, plumbing connections, and filling sequentially. For optimal performance, align with seasonal wicking bed principles.
10) Seasonal Cover Integration
Integrate seasonal covers into your self watering raised bed, using hoops and fabric for frost protection or shade. You attach frames over the bed, ensuring the watering system operates beneath. This extends growing seasons, safeguarding plants from extremes.
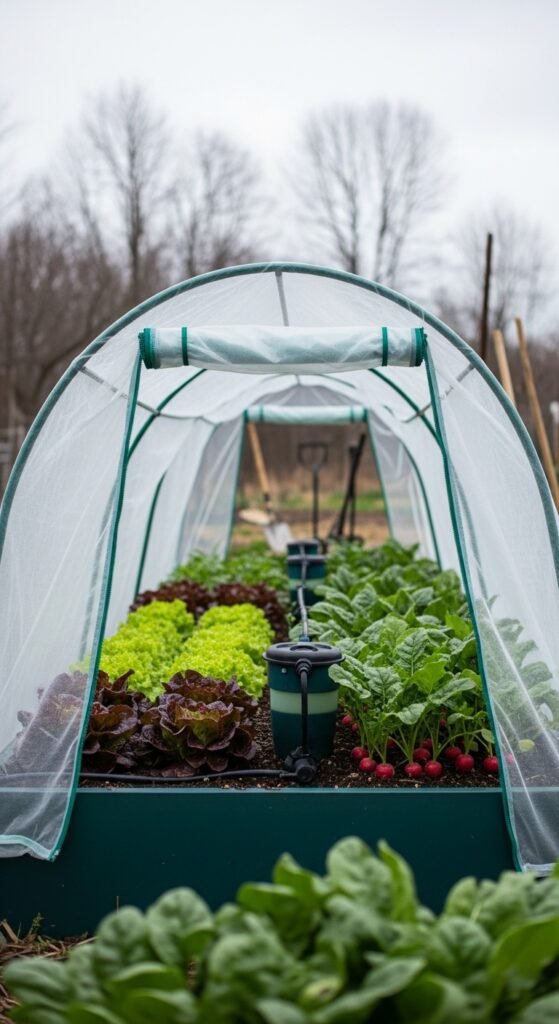
You achieve year-round productivity, with the cover complementing moisture control. Ideal for transitional weather, it prevents evaporation spikes. Install by erecting hoops, securing covers, and monitoring reservoir levels. Draw from broader gardening strategies for balanced implementation.
11) Compost-Integrated Model
Incorporate a central compost bin into your self watering raised bed, allowing nutrient-rich leachate to feed the reservoir. You build a compartmentalized structure, with compost decomposing to enrich water. This creates a closed-loop system, enhancing soil fertility naturally.
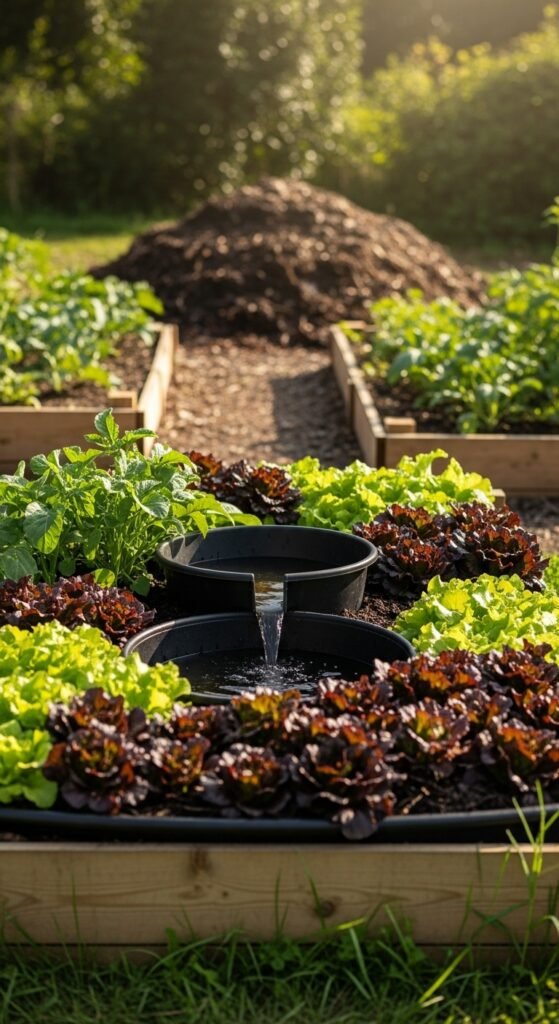
You witness accelerated growth and reduced fertilizer needs, promoting sustainability. The integration recycles waste effectively. Construct by centering the bin, lining appropriately, and layering materials. This aligns with permaculture approaches for holistic gardening.
12) Keyhole Layout Variation
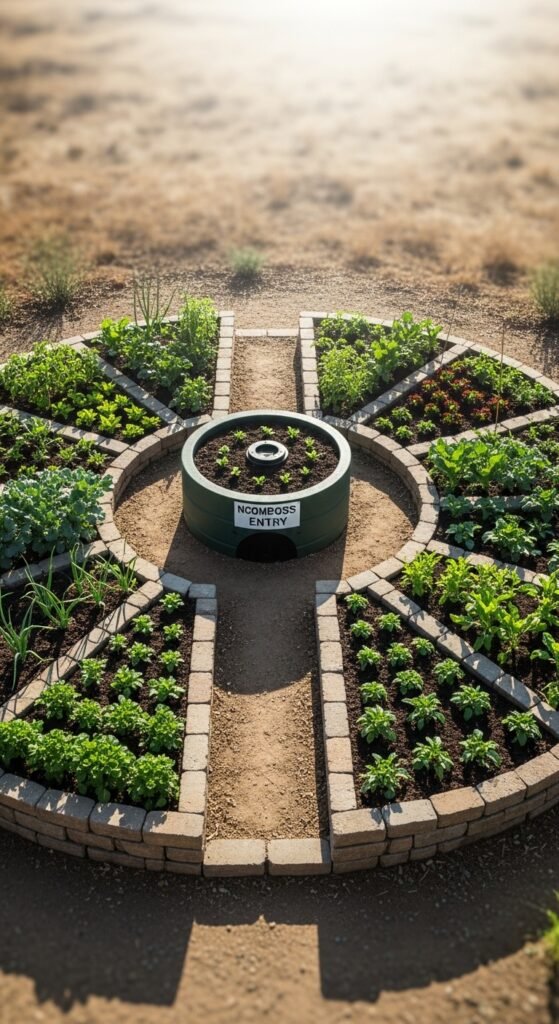
Adopt a keyhole layout for your self watering raised bed, featuring a central access path and composting core. You shape the bed in a circular form with a notch, integrating wicking from the center. This facilitates easy reach and nutrient distribution, optimizing space.
You enjoy efficient maintenance and enriched soil from compost breakdown. Suitable for arid regions, it conserves water profoundly. Form the shape, add the reservoir, and plant radially for best results.
13) Drip Irrigation Hybrid
Hybridize your self watering raised bed with drip irrigation lines running through the soil, supplementing the bottom reservoir. You embed emitters for targeted delivery, controlled by timers. This hybrid ensures even distribution, adapting to specific plant needs.
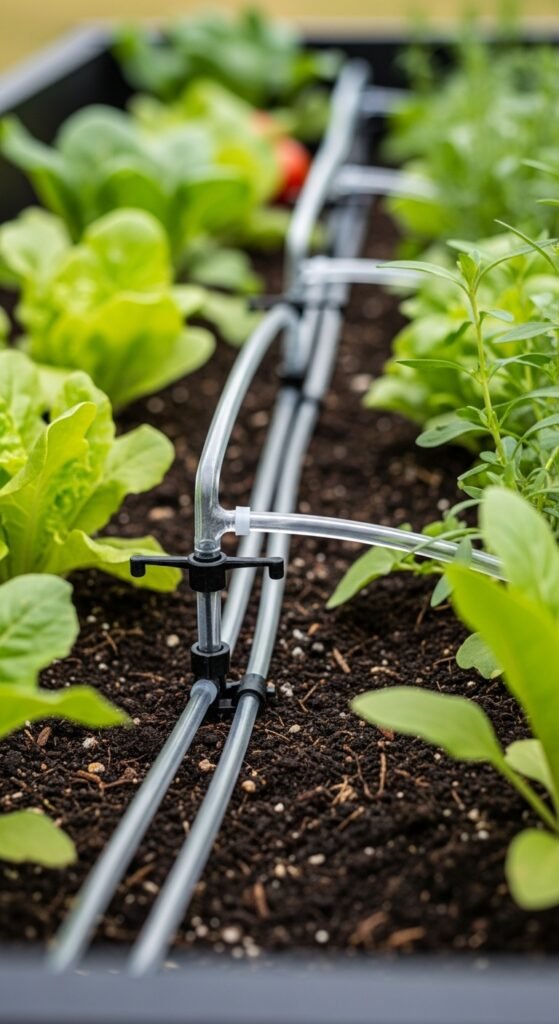
You gain flexibility for diverse crops, with reduced evaporation compared to overhead methods. The combination maximizes efficiency. Install by laying lines post-reservoir, connecting to a source, and testing flow.
14) Olla Pot Incorporation
Incorporate traditional olla pots into your self watering raised bed, burying unglazed clay vessels filled with water to seep slowly into soil. You place multiple ollas strategically among plants. This ancient technique provides precise, root-level hydration, conserving resources.
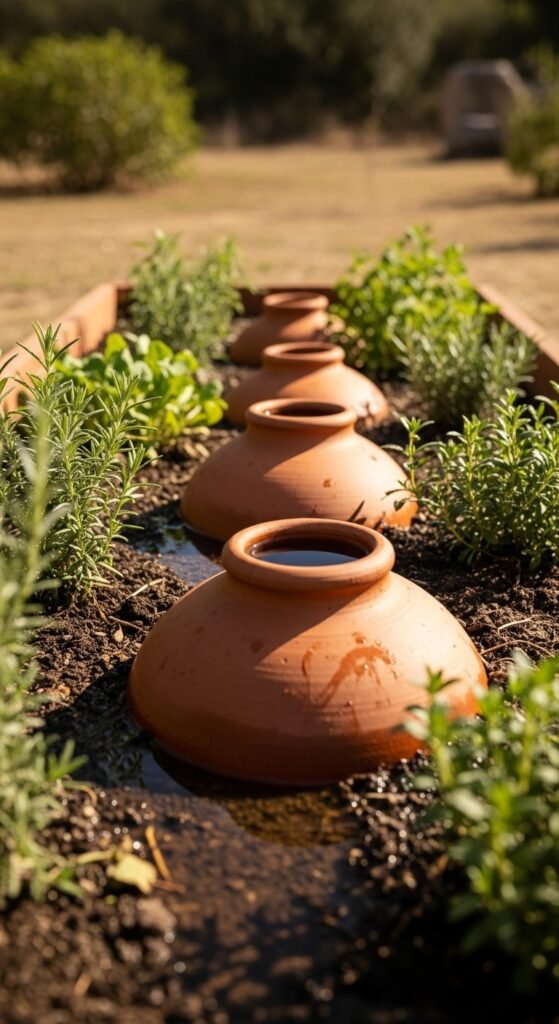
You observe minimal surface wetting, deterring weeds and fungi. Cost-effective and low-tech, it’s ideal for dry climates. Bury pots neck-exposed, refill as needed, and integrate with bed construction for seamless operation.
15) Sub-Irrigation Planter Style
Design your self watering raised bed as a large-scale sub-irrigation planter, with a false bottom reservoir and overflow safeguards. You use commercial kits or DIY elements for scalability. This style supports intensive planting, delivering water upward efficiently.
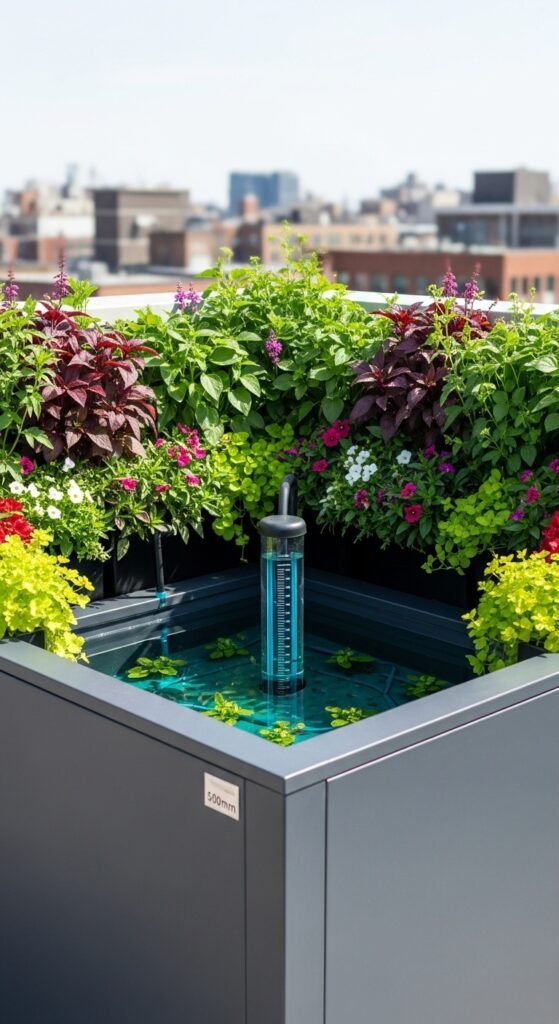
You benefit from uniform moisture and simplified upkeep, enhancing urban or commercial applications. The method suits high-density crops. Assemble the base, add separators, and monitor via indicators for sustained performance.
Key Principles of Self Watering Raised Beds
Moisture Management Fundamentals
You prioritize balanced moisture by selecting appropriate wicking materials like coconut coir or felt, ensuring steady capillary action without saturation. Monitor soil levels regularly to prevent anaerobic conditions.
Material Selection Guidelines
Choose durable, non-toxic materials for frames and liners, such as cedar wood or food-grade plastics, to withstand weather and avoid chemical leaching into soil.
Sustainability Integration Tips
Incorporate eco-friendly elements like solar features or recycled components to align your bed with broader environmental goals, reducing overall garden footprint.
Frequently Asked Questions
What materials are best for building a self watering raised bed?
Cedar or redwood for frames offer natural rot resistance, while pond liners or heavy-duty plastic sheeting serve well for waterproofing. Ensure all components are safe for edible plants.
How often do I need to refill the reservoir?
Refilling frequency depends on climate, plant types, and bed size, typically every 1-2 weeks in moderate conditions. Check indicators or soil moisture to guide you.
Can self watering raised beds be used in cold climates?
Yes, with insulation and drainage adjustments to prevent freezing. Drain reservoirs before frost and use covers for protection during winter months.
Are there any drawbacks to self watering systems?
Potential issues include initial setup costs and risks of over-reliance on the system if not monitored. Proper design mitigates these, ensuring long-term benefits.
How do I troubleshoot uneven watering?
Inspect for clogs in wicking materials or uneven reservoir distribution. Adjust soil composition or add more fill points to achieve uniform moisture.